Heart Pendant
PComp Final 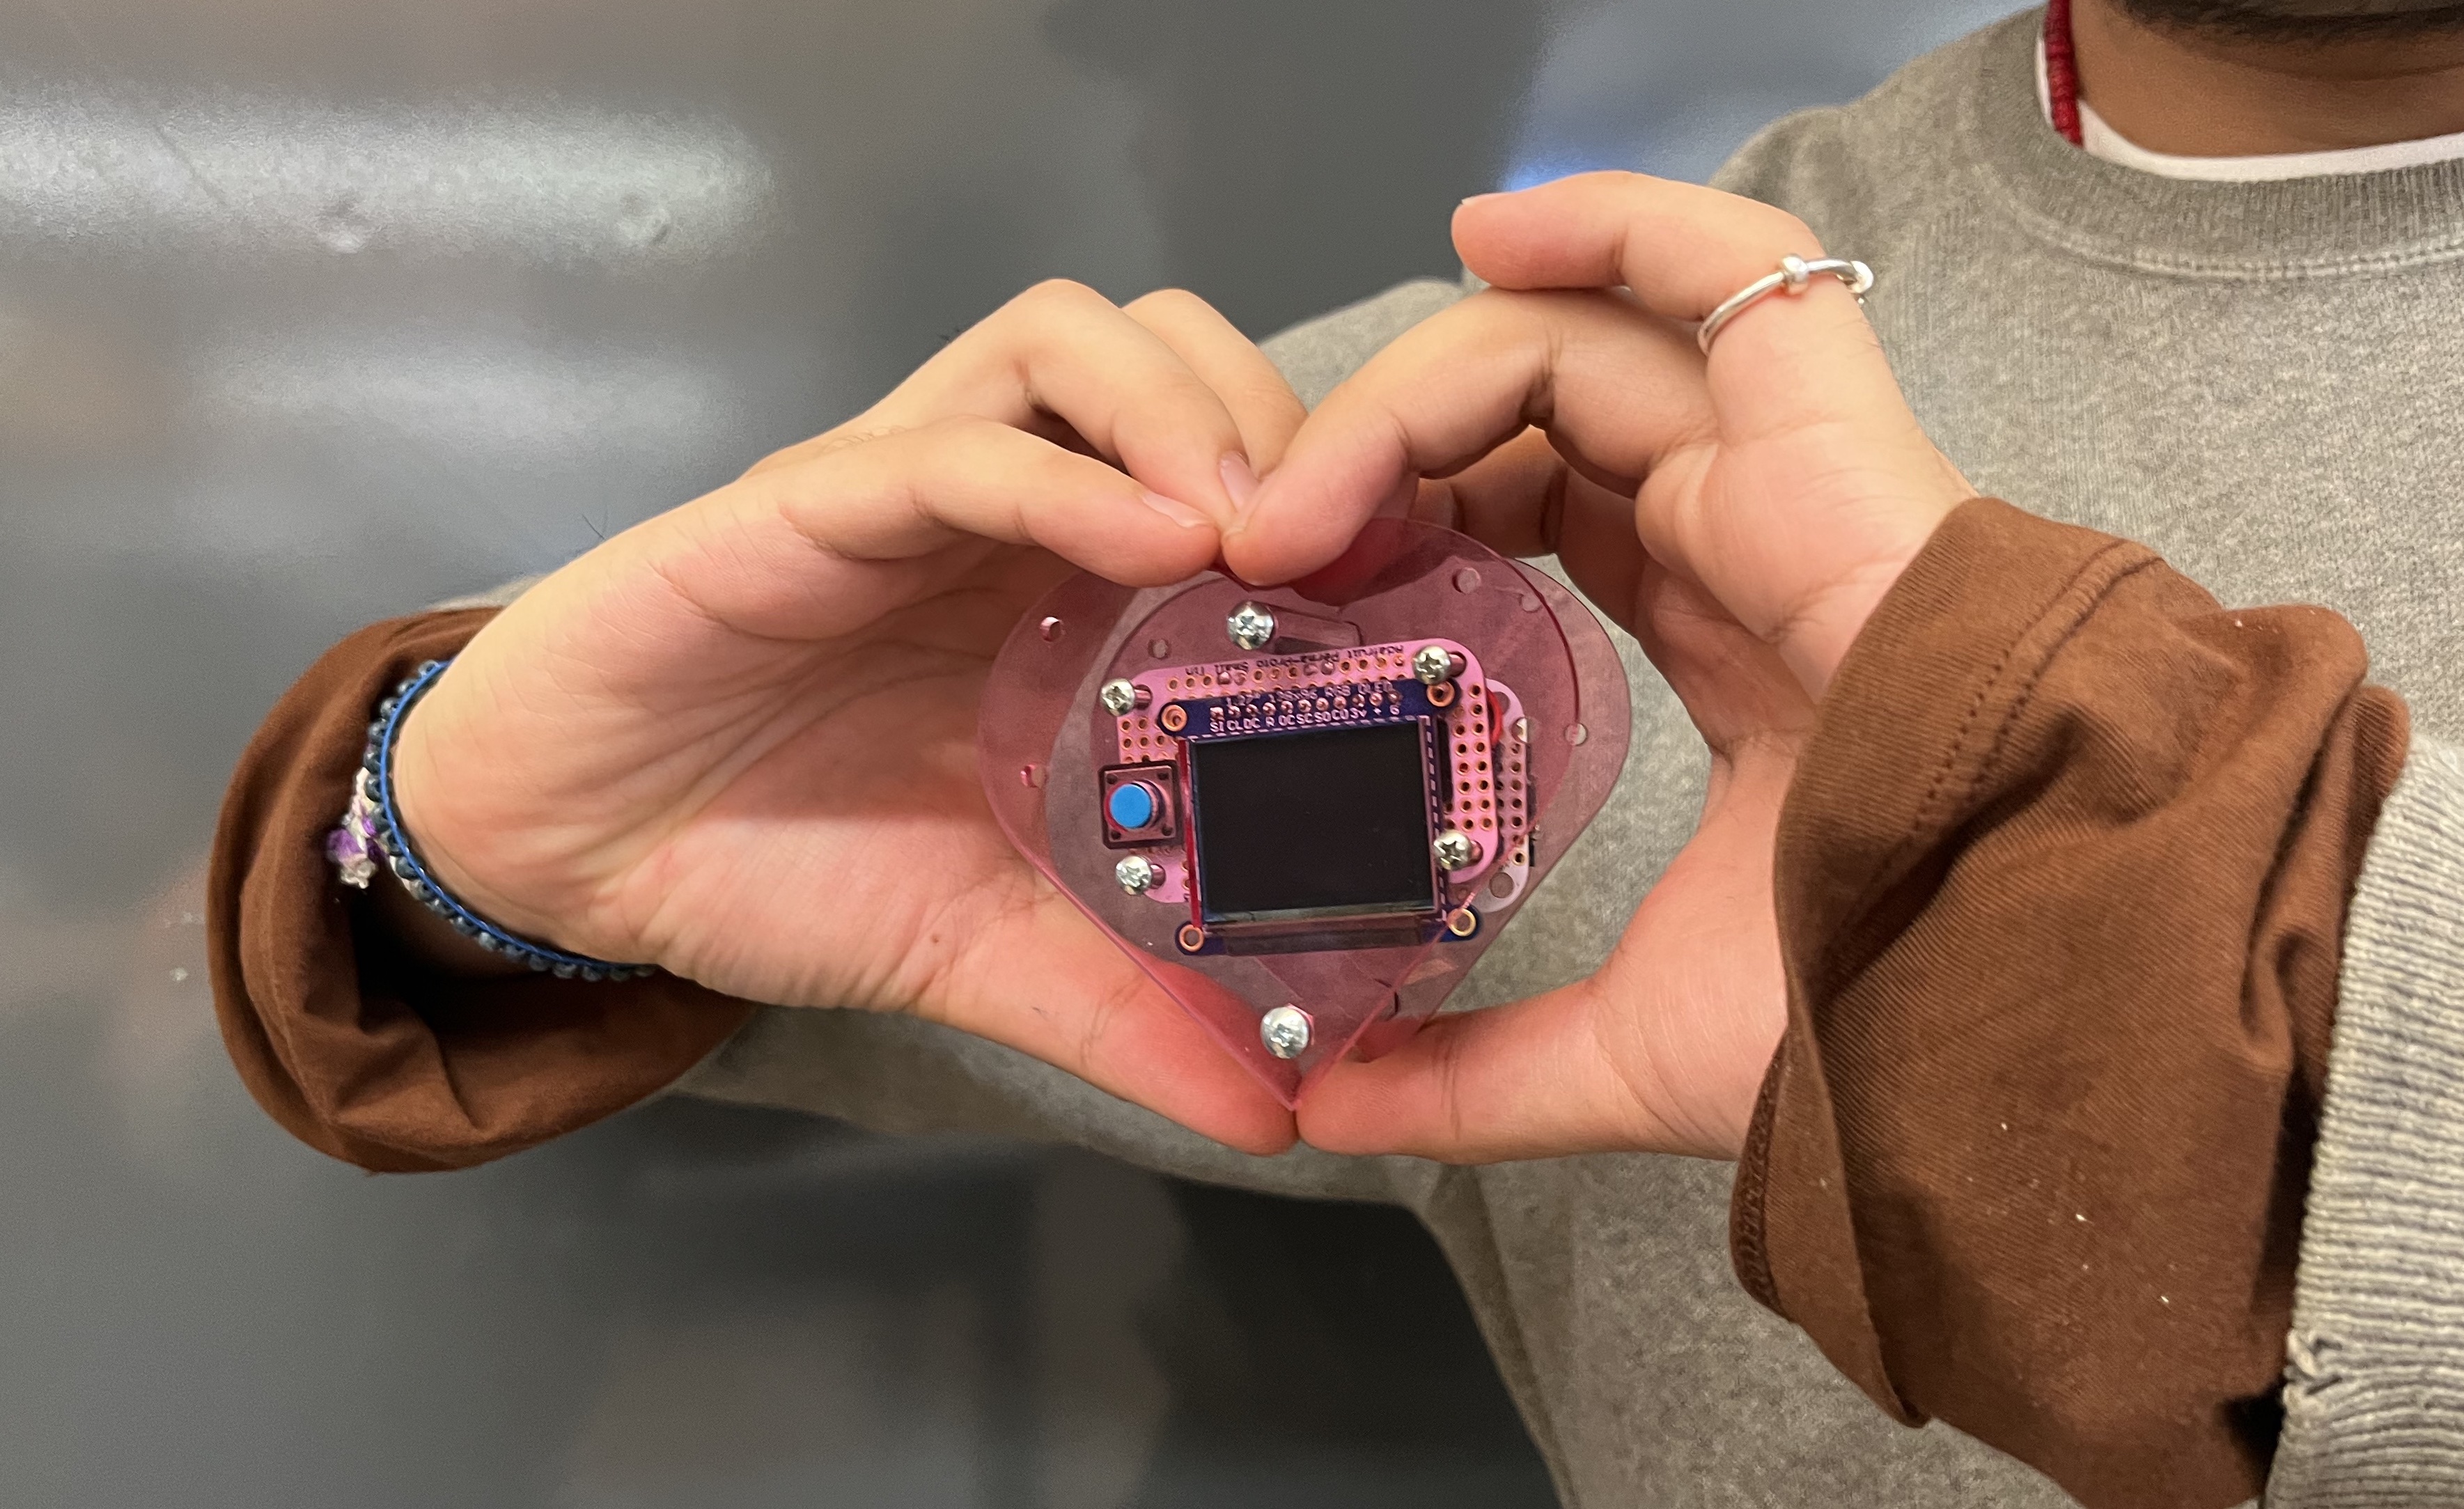
OLED Lab:
Before I started to work on the OLED screen that I am currently working with. I did the OLED lab to get familiar with the OLED. Using the screen to show the reading from the sensor.
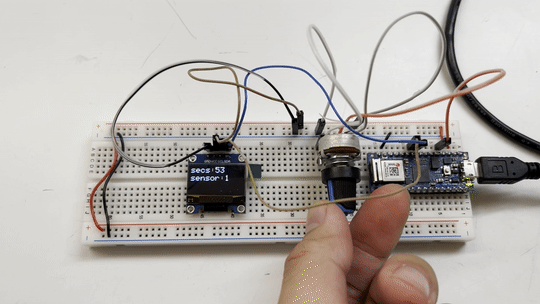
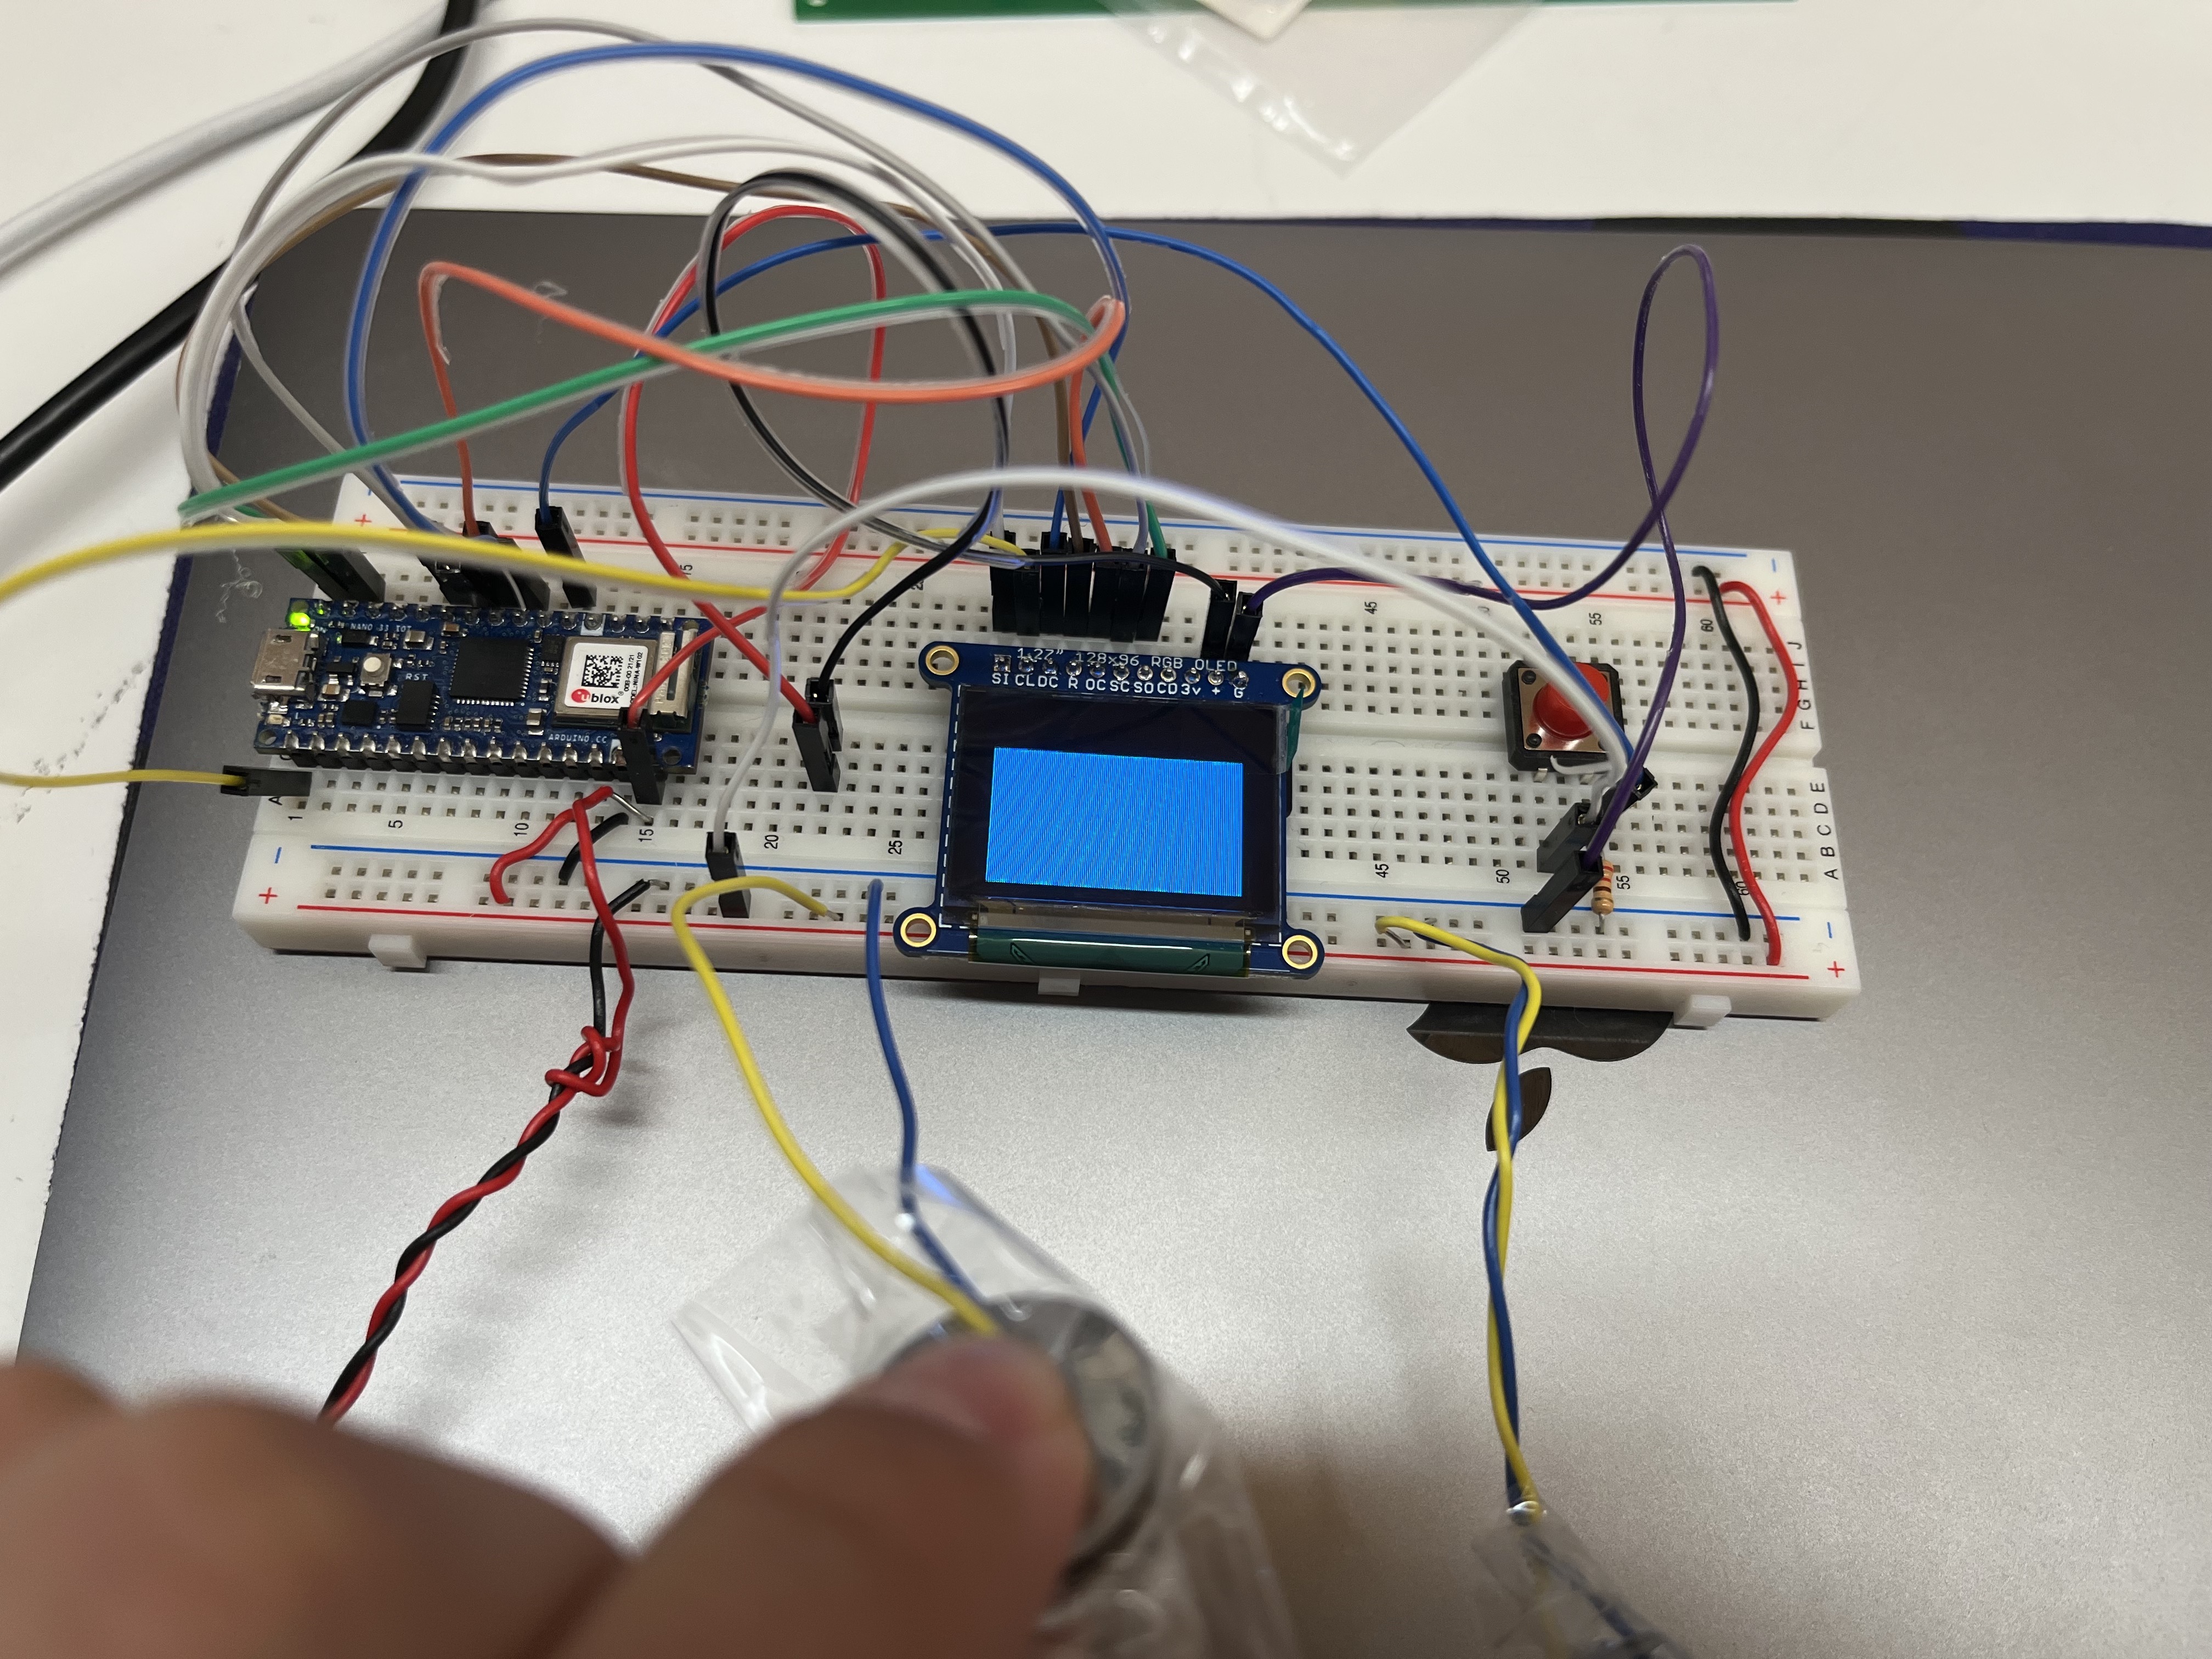
Wiring Up the OLED:

Using the example code to upload images/videos via codes. (Please be noted that the flashing and black stripes in the gifs are only occurring when the screen is being taken a photo of)
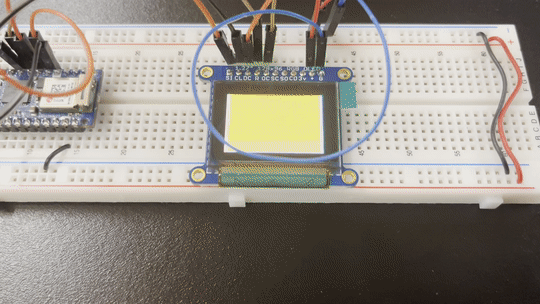
Using SD card:

After rewiring the OLED screen. I used codes to call the image from the SD card and resize the image for the screen (Still working on this.. ).

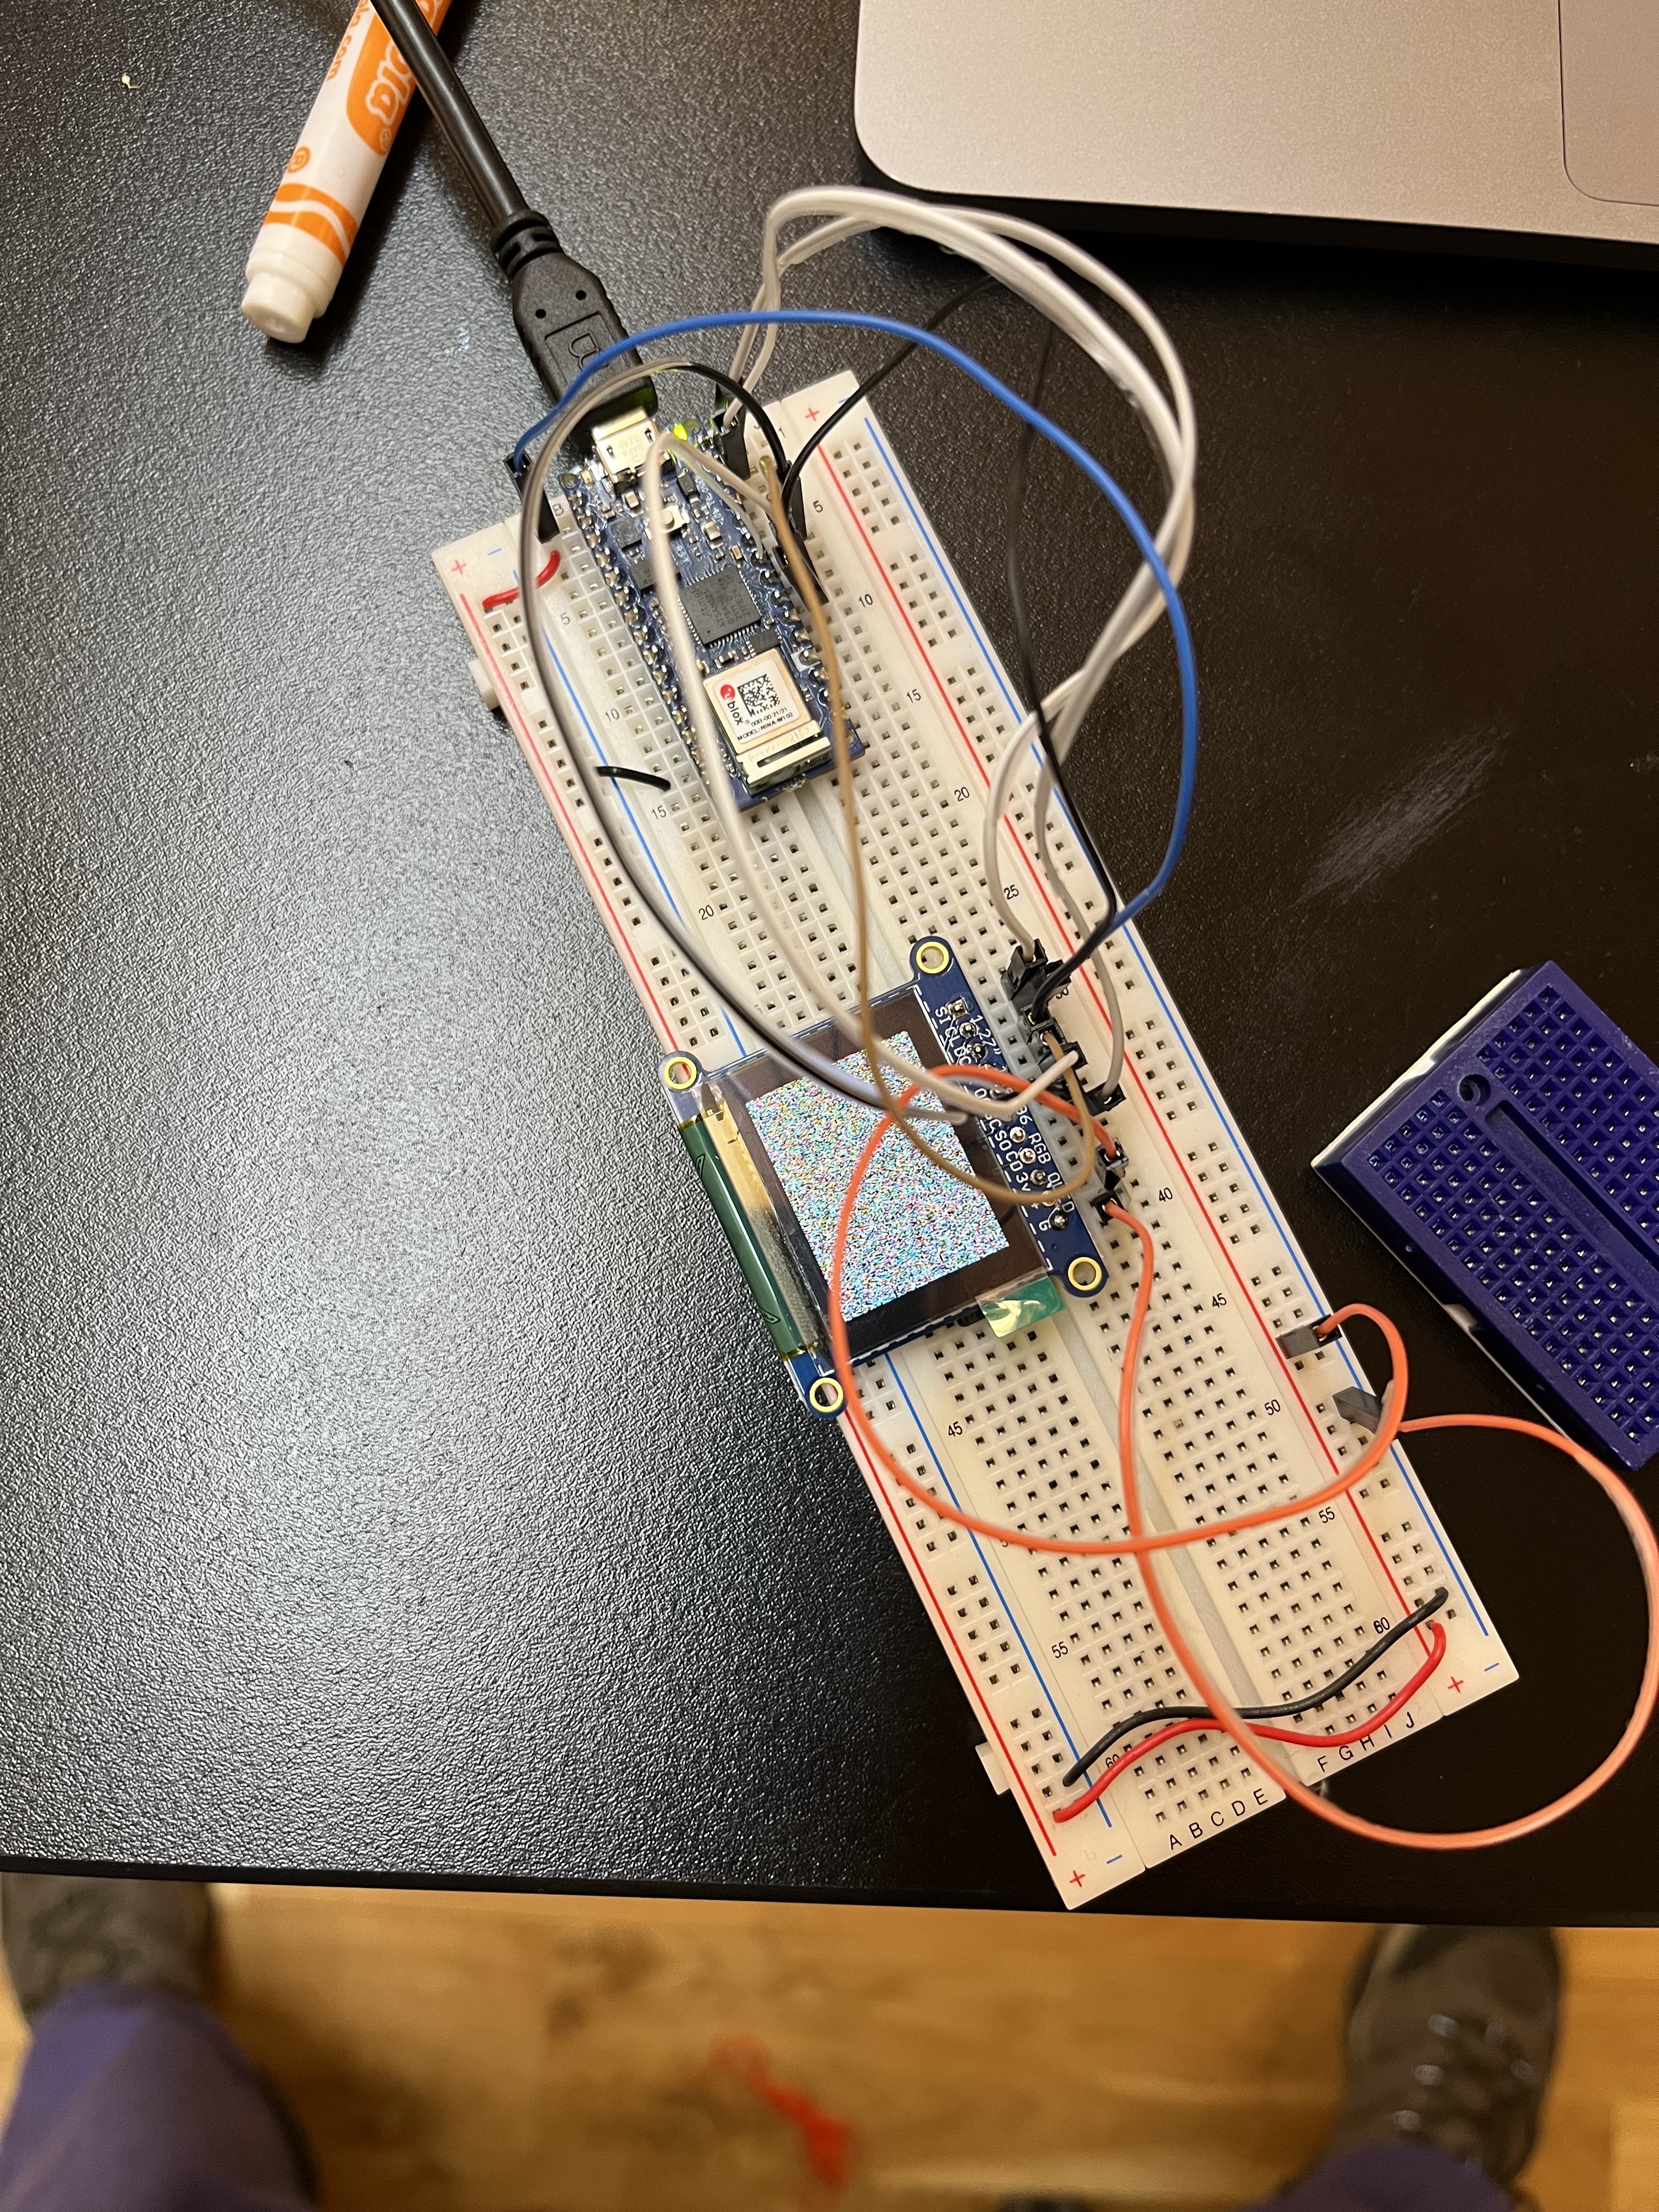
In the beginning, there were issues with the image upload. But that was due to the fact that the ground was 3.3V. It was working fine in the previous experiment. Once the Arduino was in 5V the image started showing.
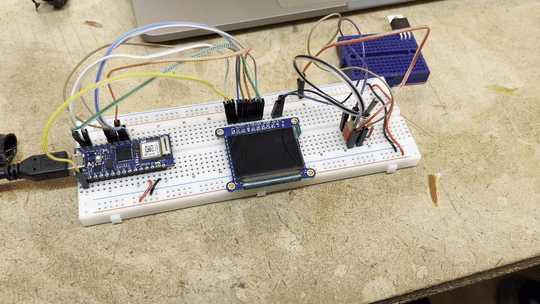
I have also added more photo and have them rotate.
Power Supply:
Power supply is the biggest challenge of this project. And sadly, I didn’t figure it out in the end.

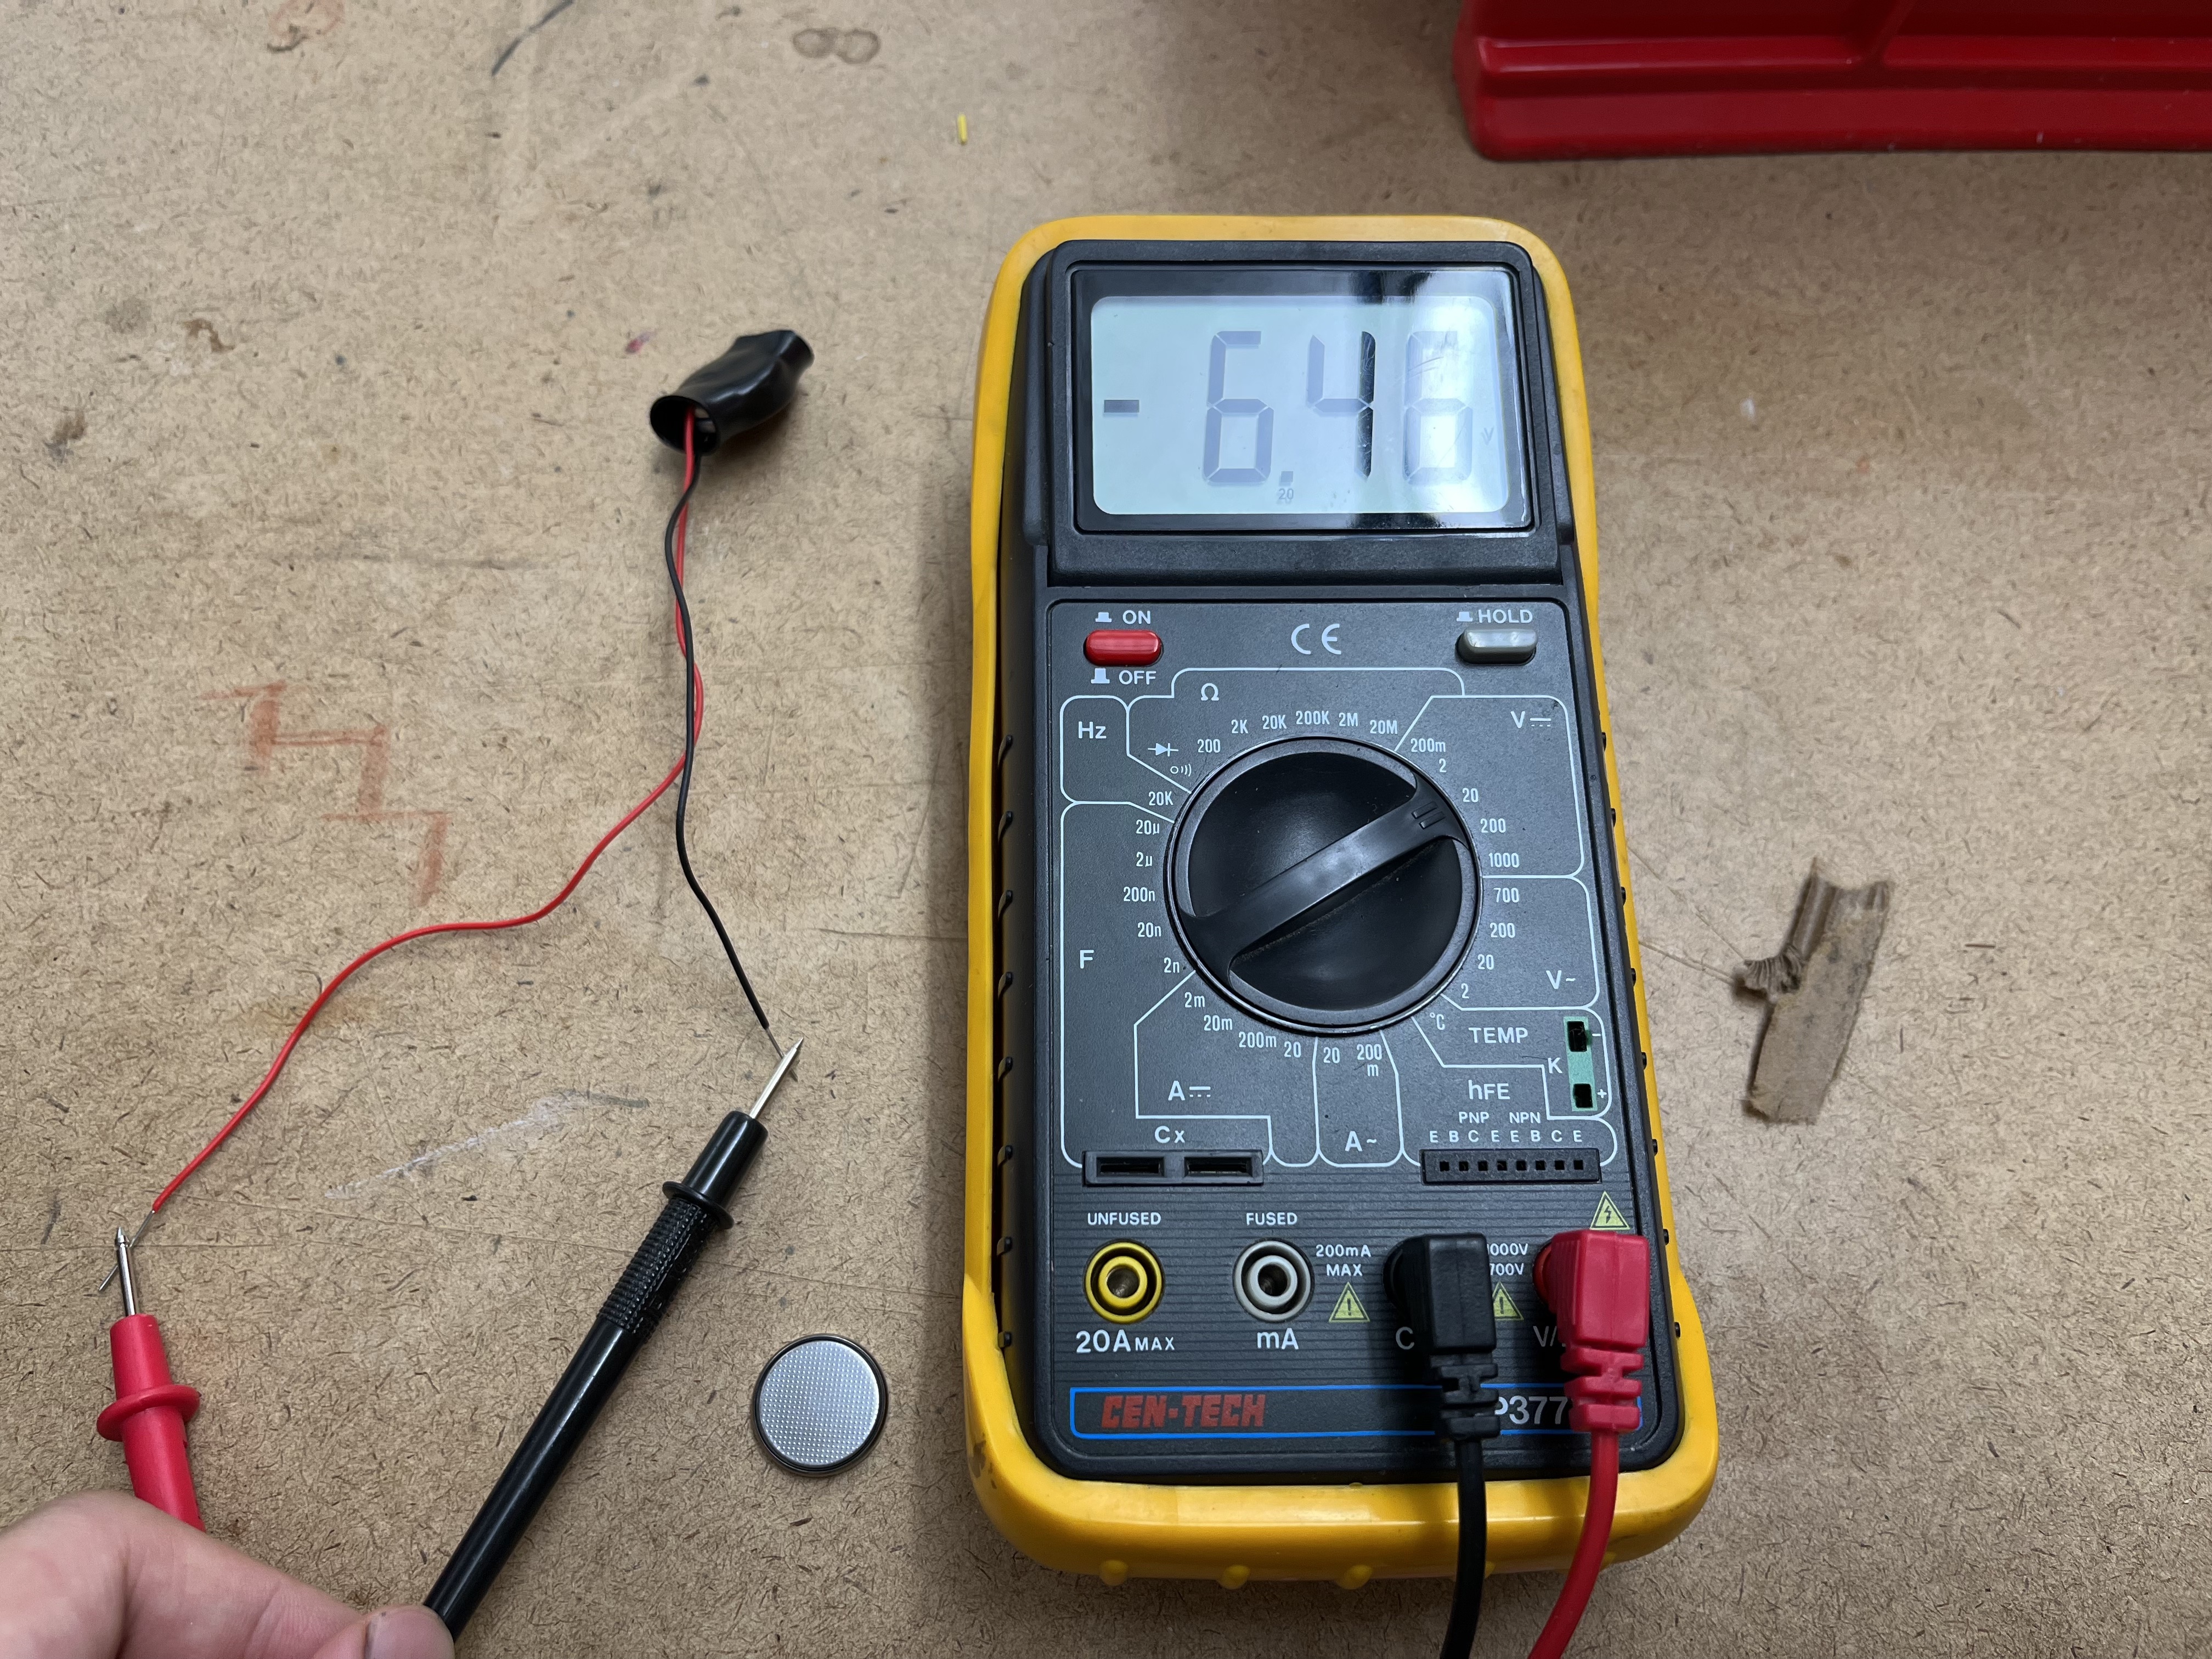
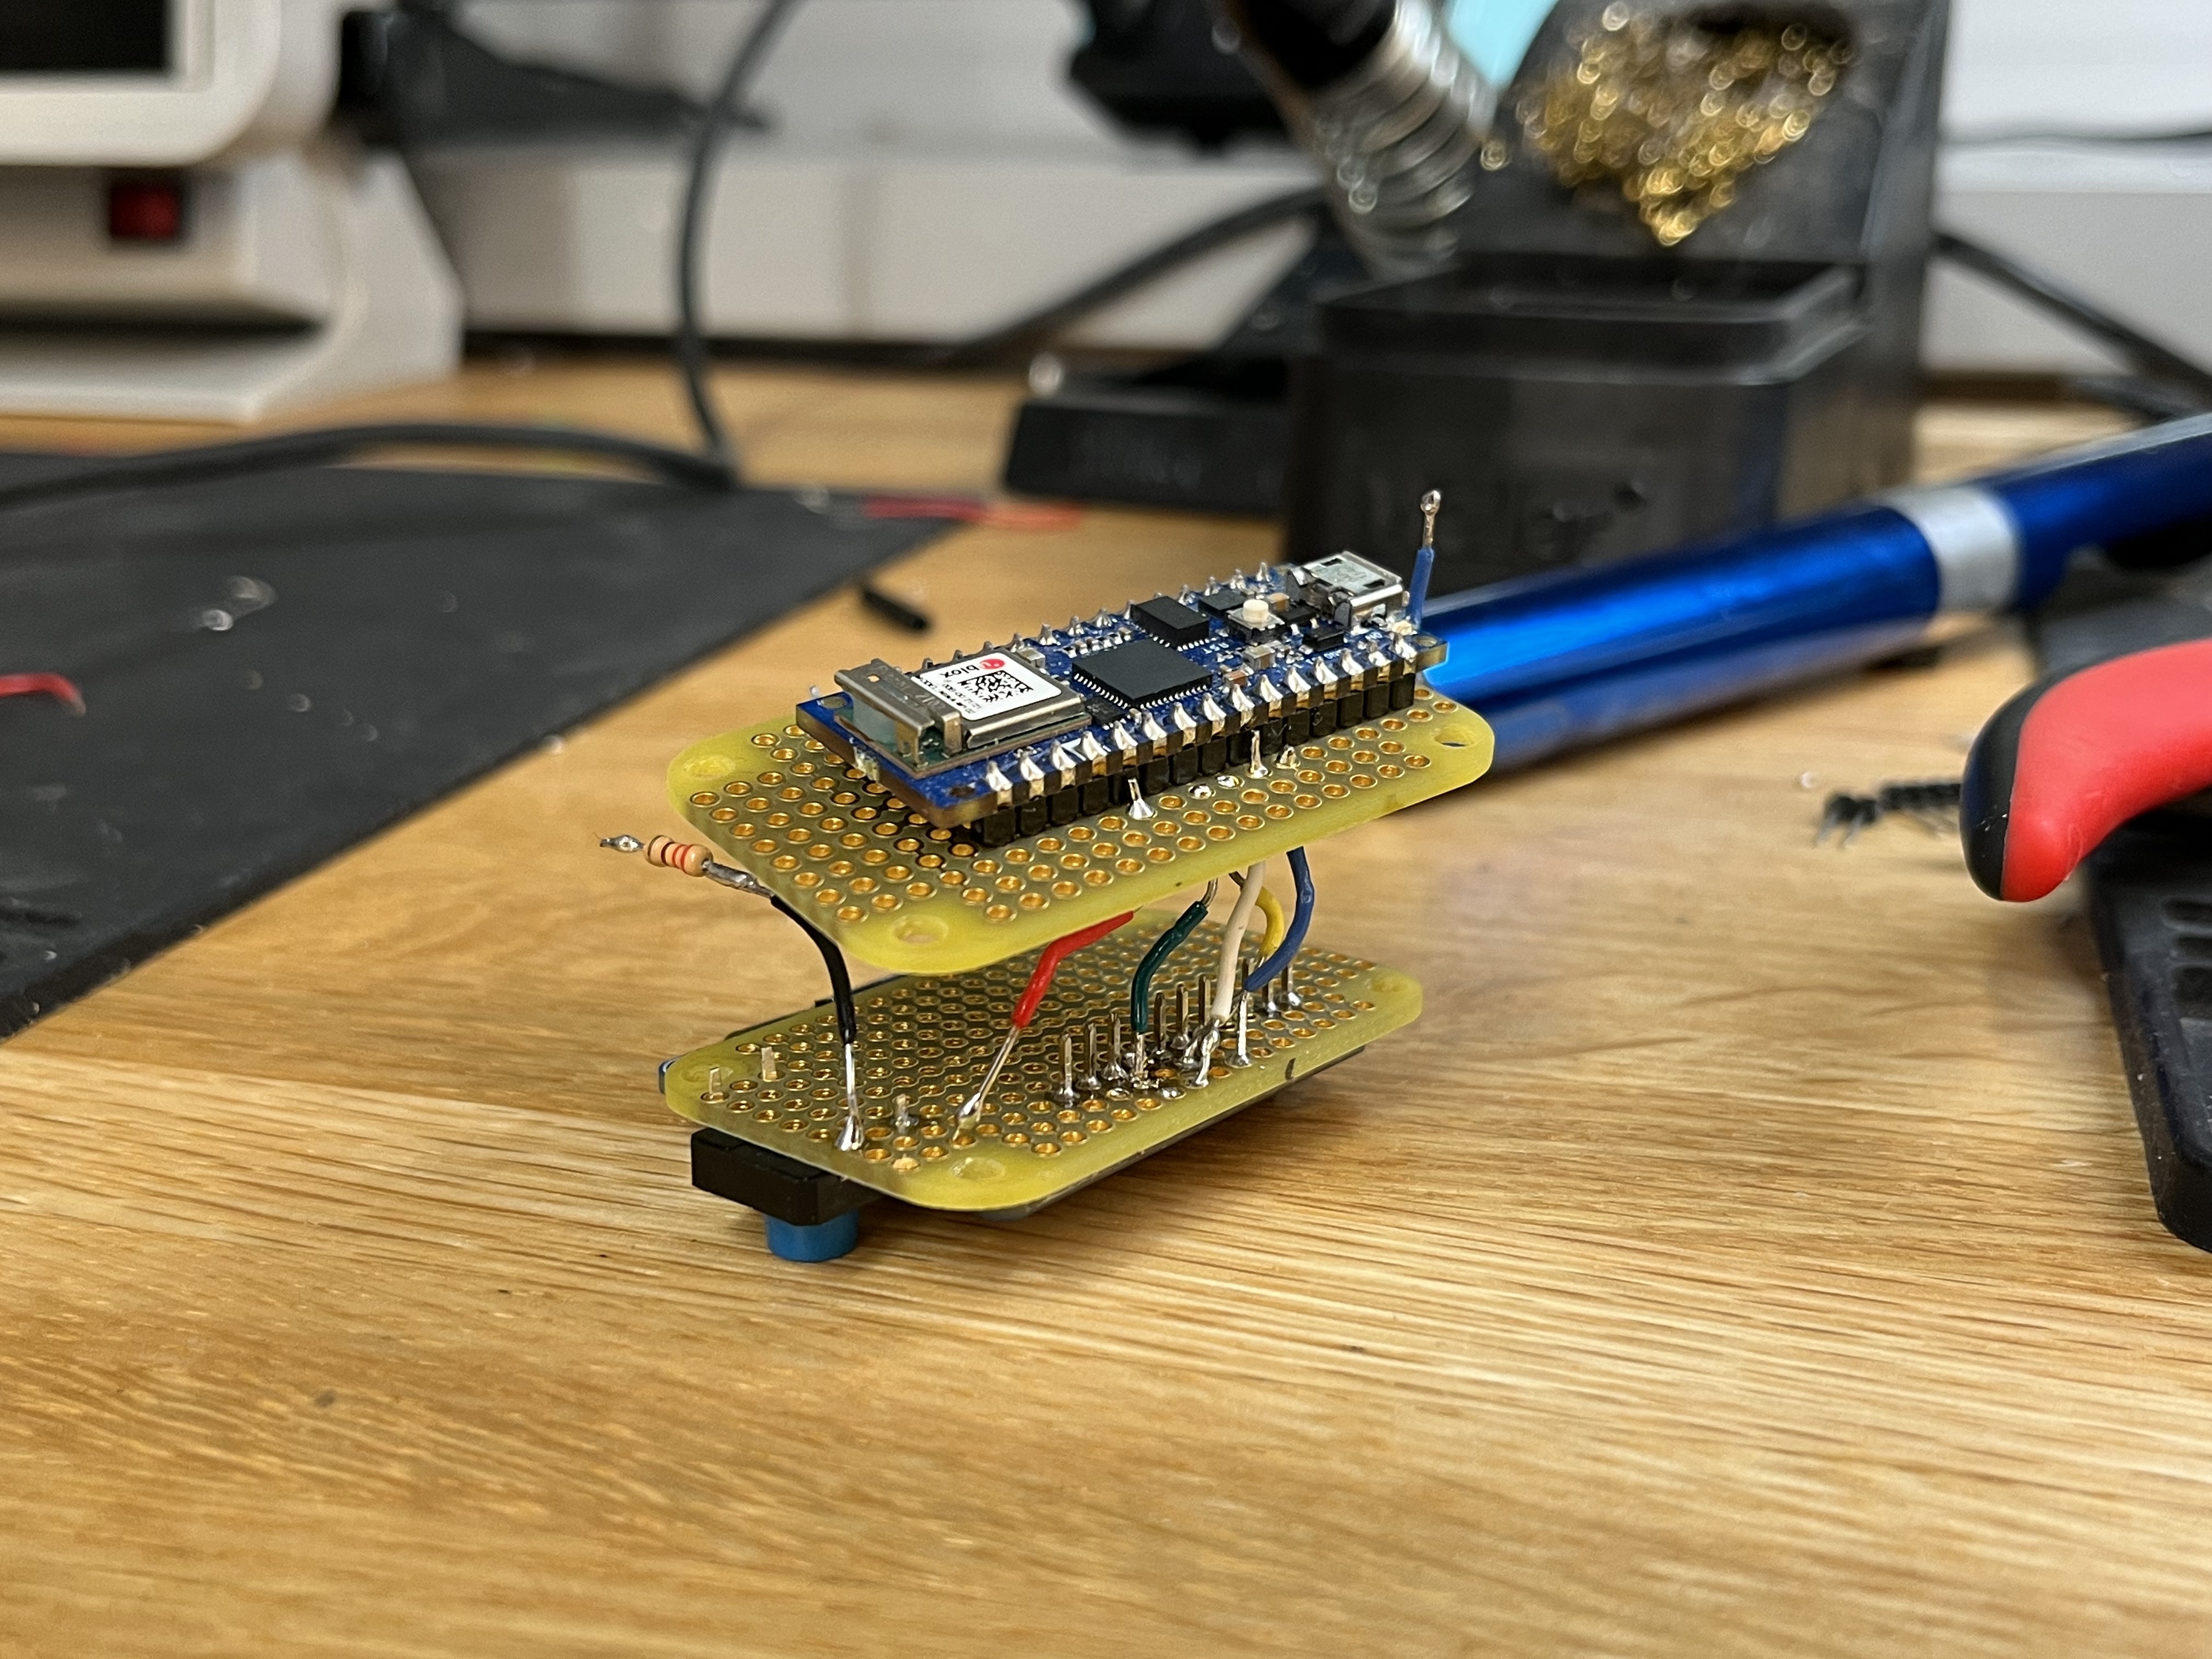
Initially, I wanted to use heat wrap to stack two 3V button batteries to make a 6V one in order to make the project as small as possible. But for some reason, it wouldn’t work. After realizing that the breakout board on the OLED screen isn’t the most advanced, I needed to attach the microcontroller to the screen. And the Arduino seems to be taking a lot of power. After testing the currents with machines, I learned that the screen and the Arduino needed at least 3.9V and 4 A to work. I couldn’t figure out why it wouldn’t work, and I was also slightly out of my mind. I stacked four batteries to see if it will work and it did. The next day David told me to wire the batteries next to each other to up the Amp. I tried it, but it would take too many batteries for it to work. So I decided to plug it in for now and focus on other aspects of the project. But since the Arduino is attached, it shouldn’t be too hard to add a battery case in the future.
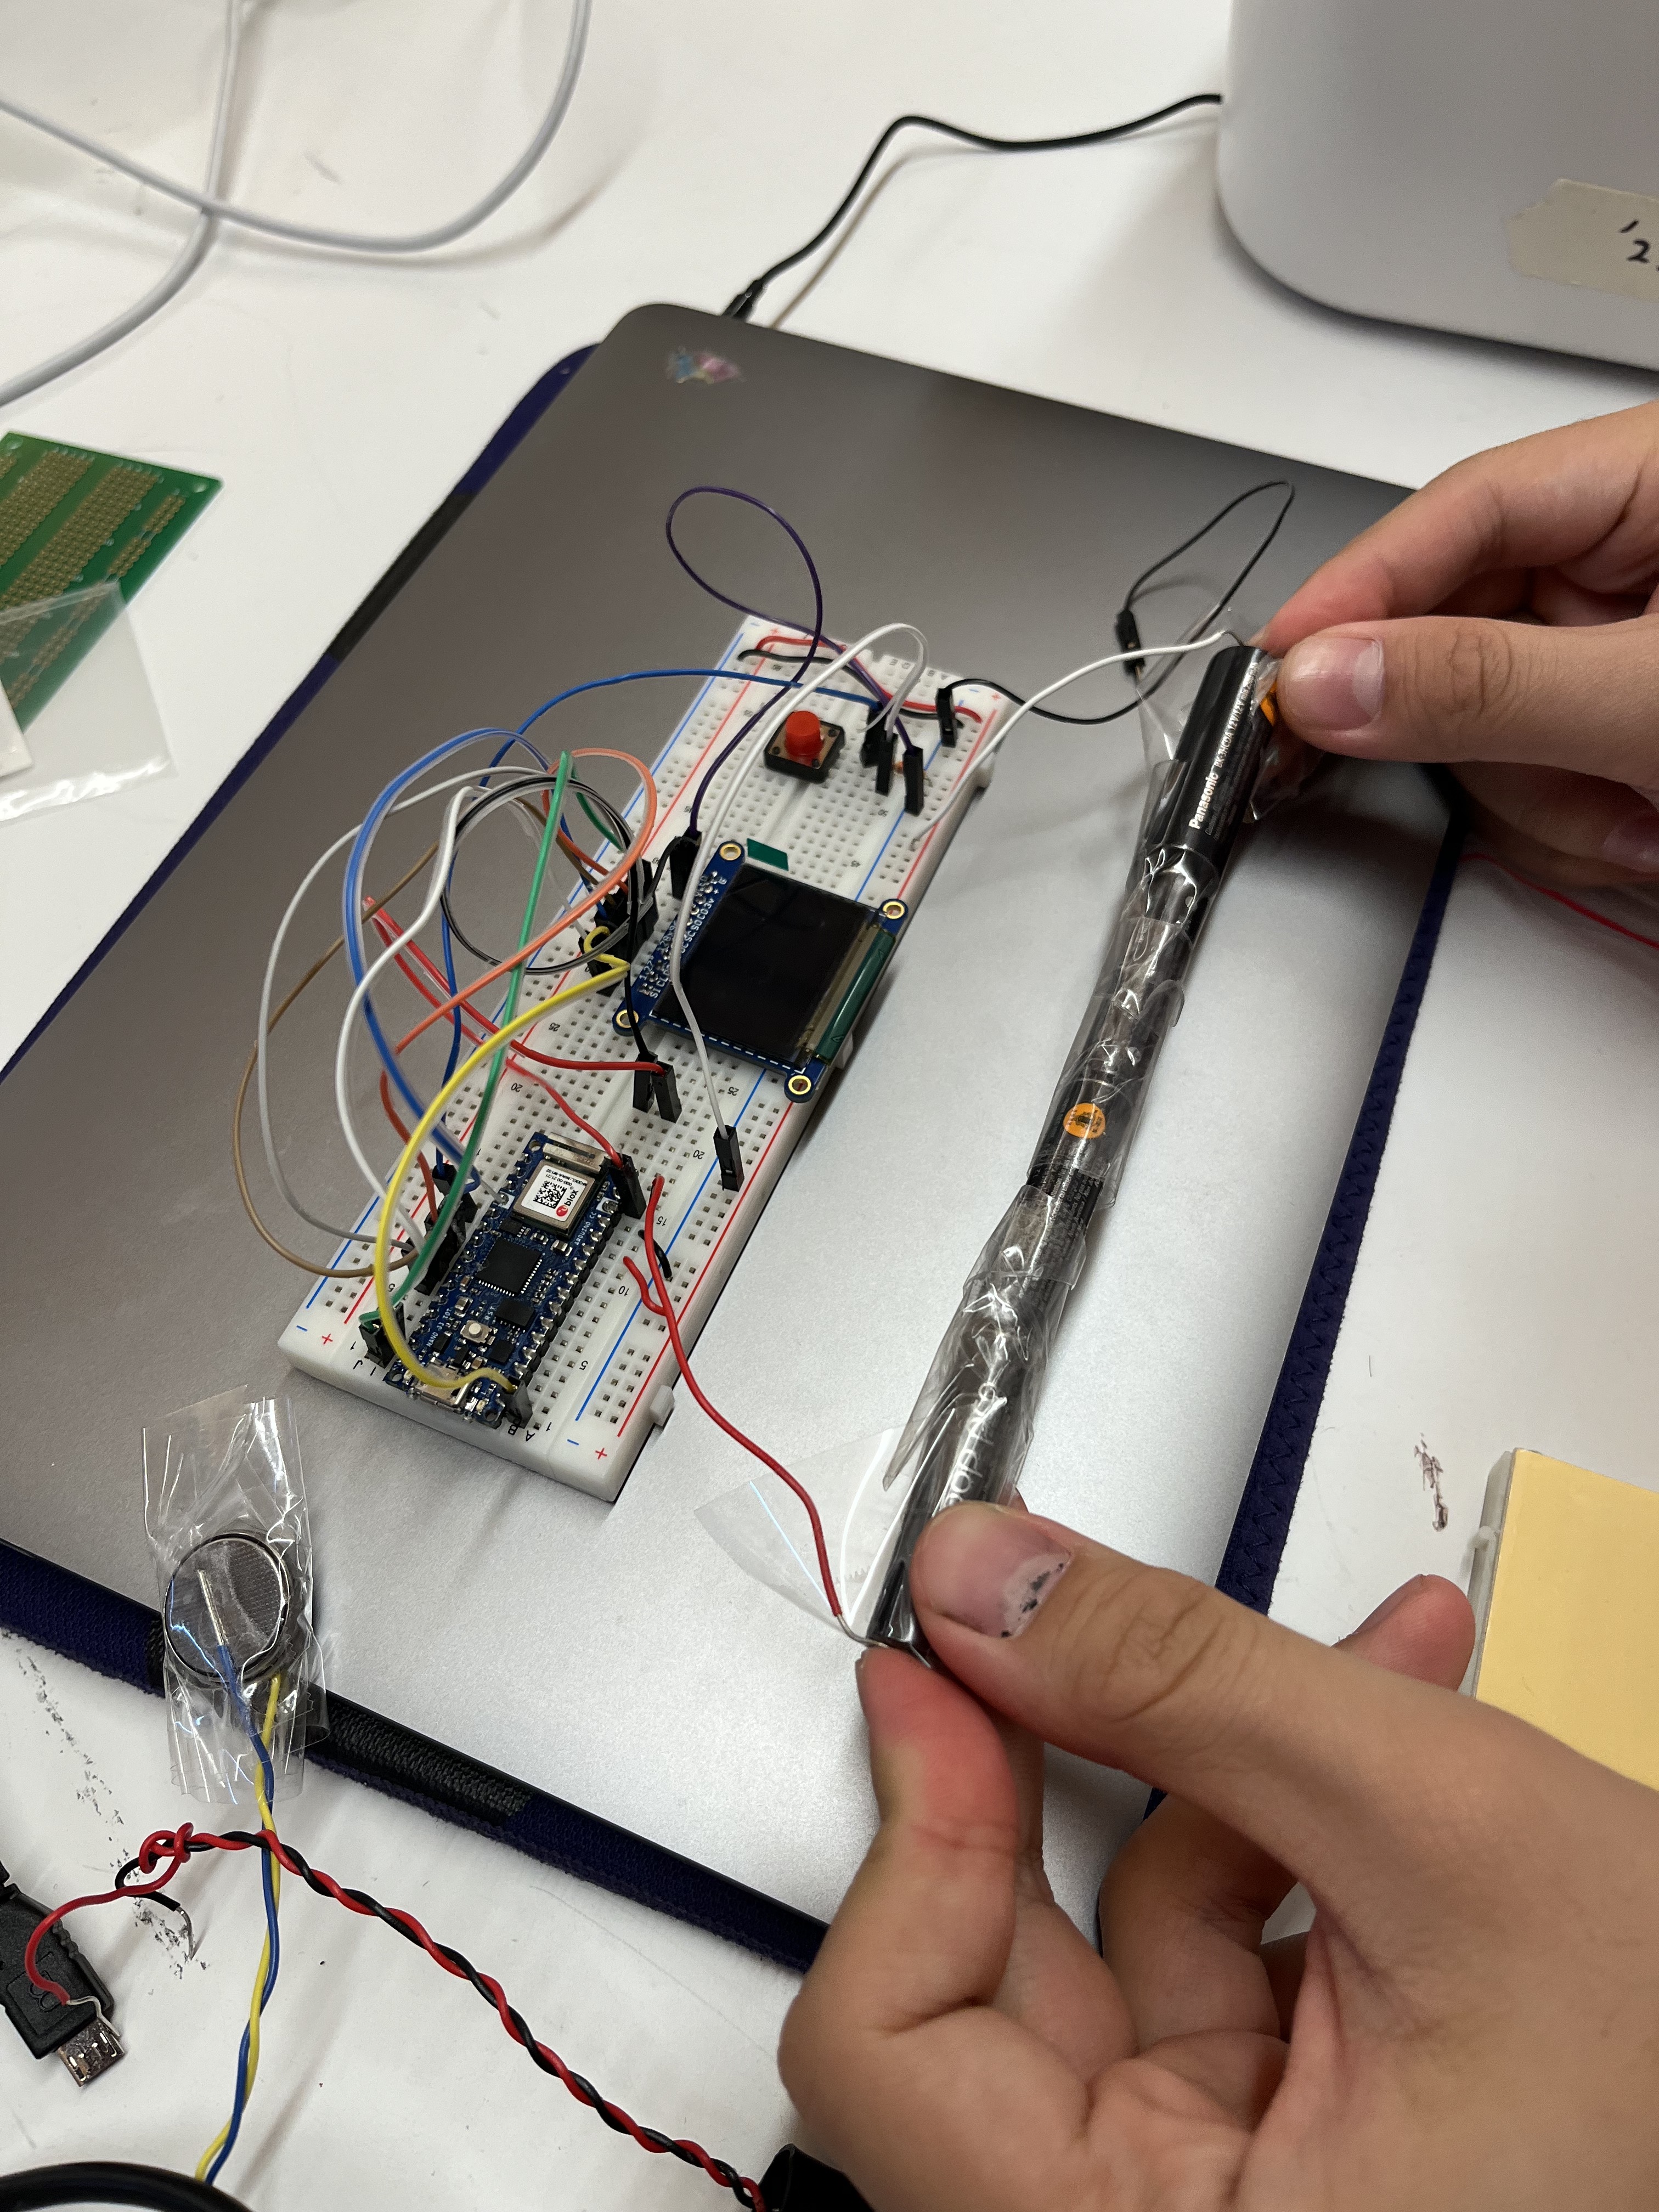
Adding the Button:
Initially, I did a toggle switch to physically cut off the power. But since the microcontroller is attached, I added a button to change the picture as it’s pressed.
Adding the Arduino:
Fab:
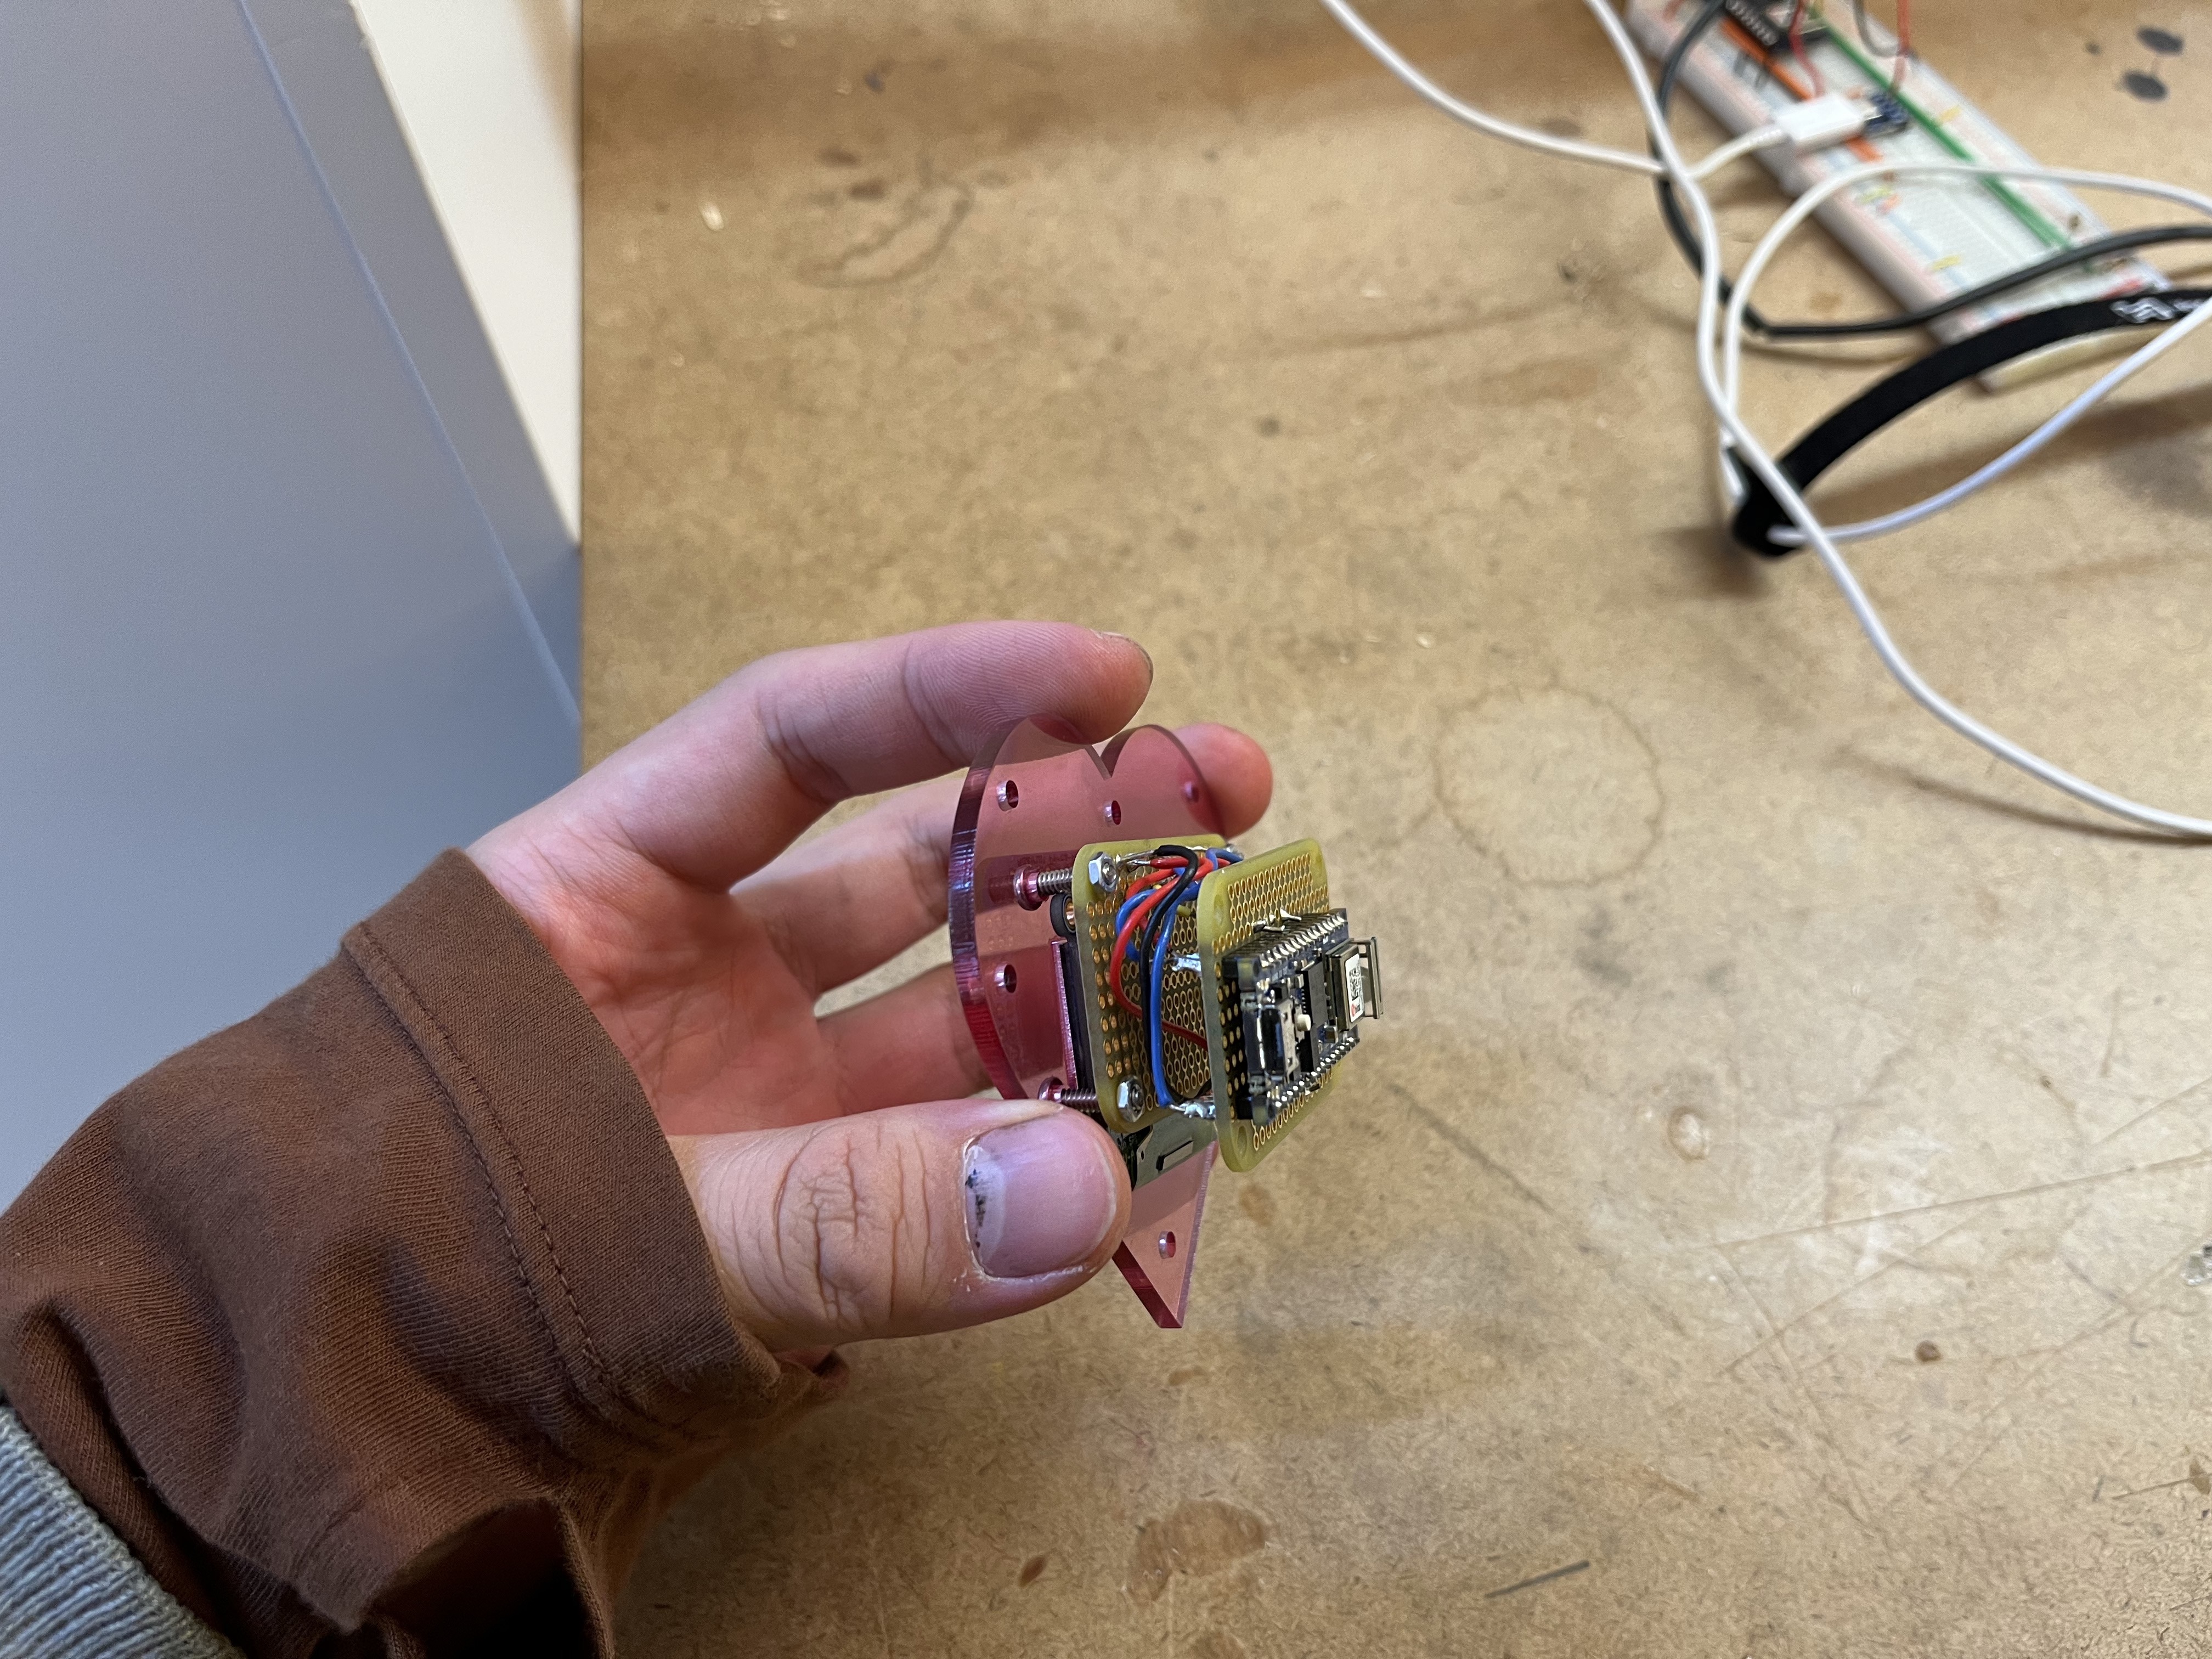
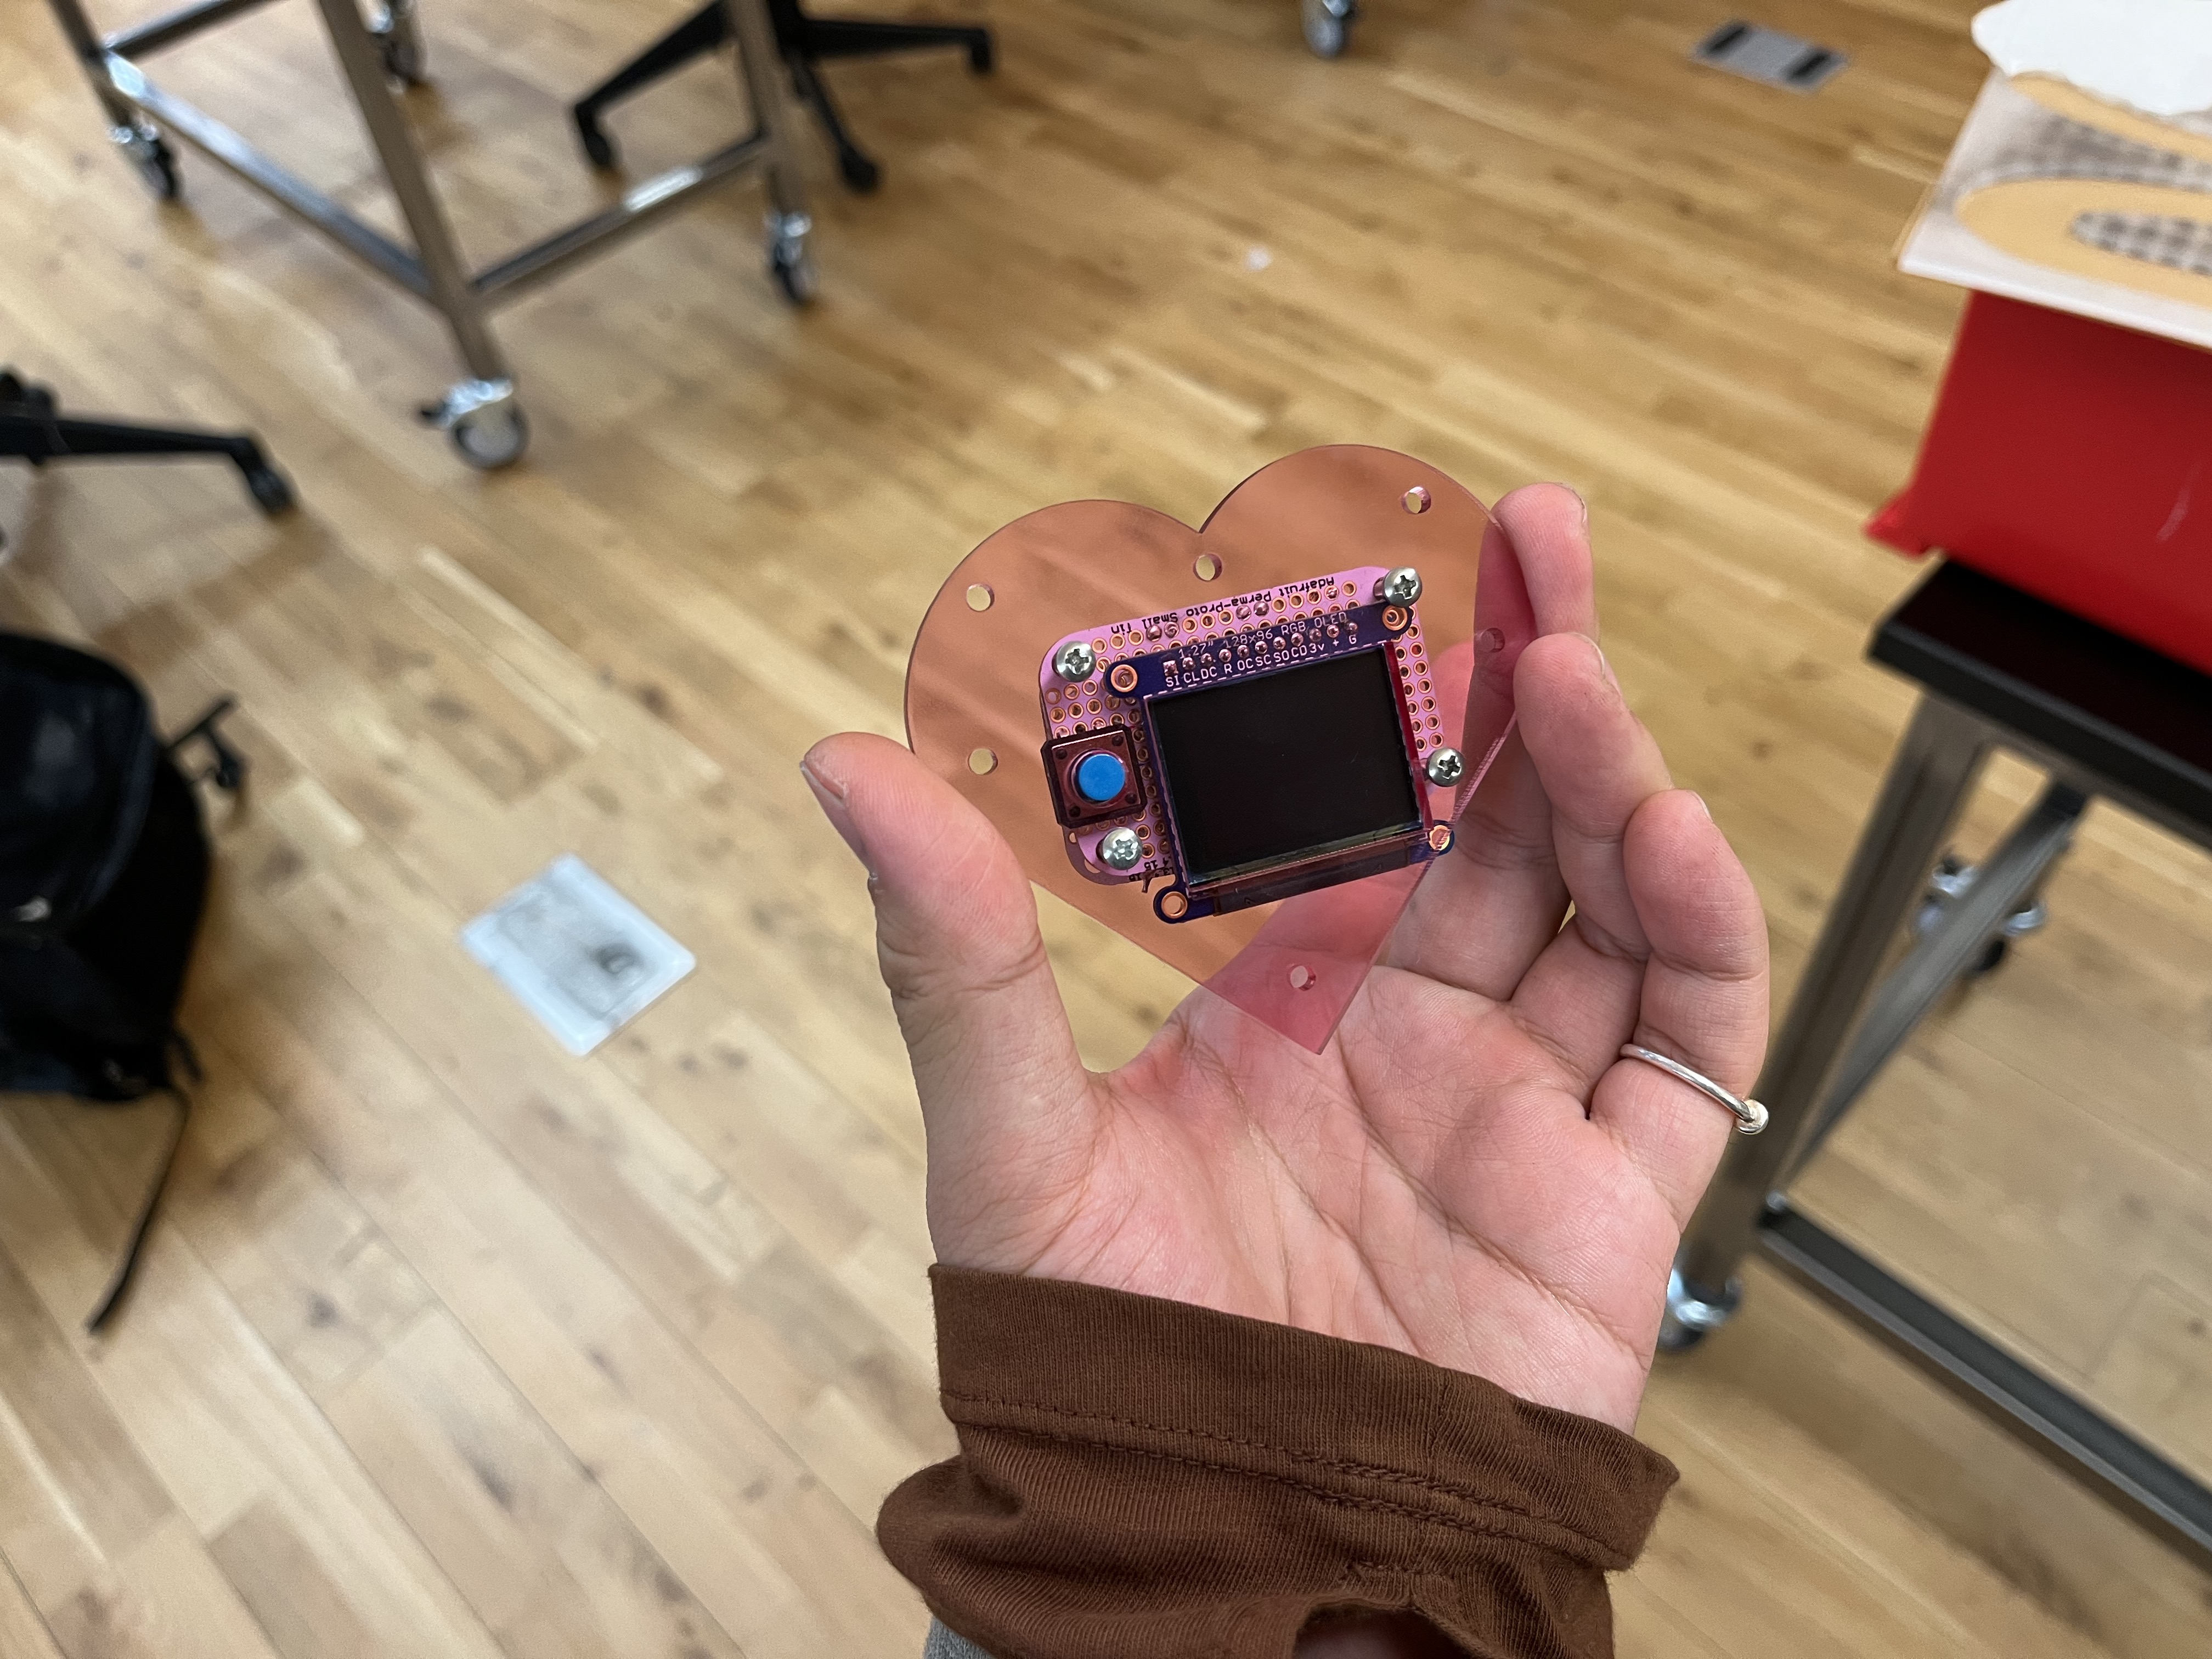
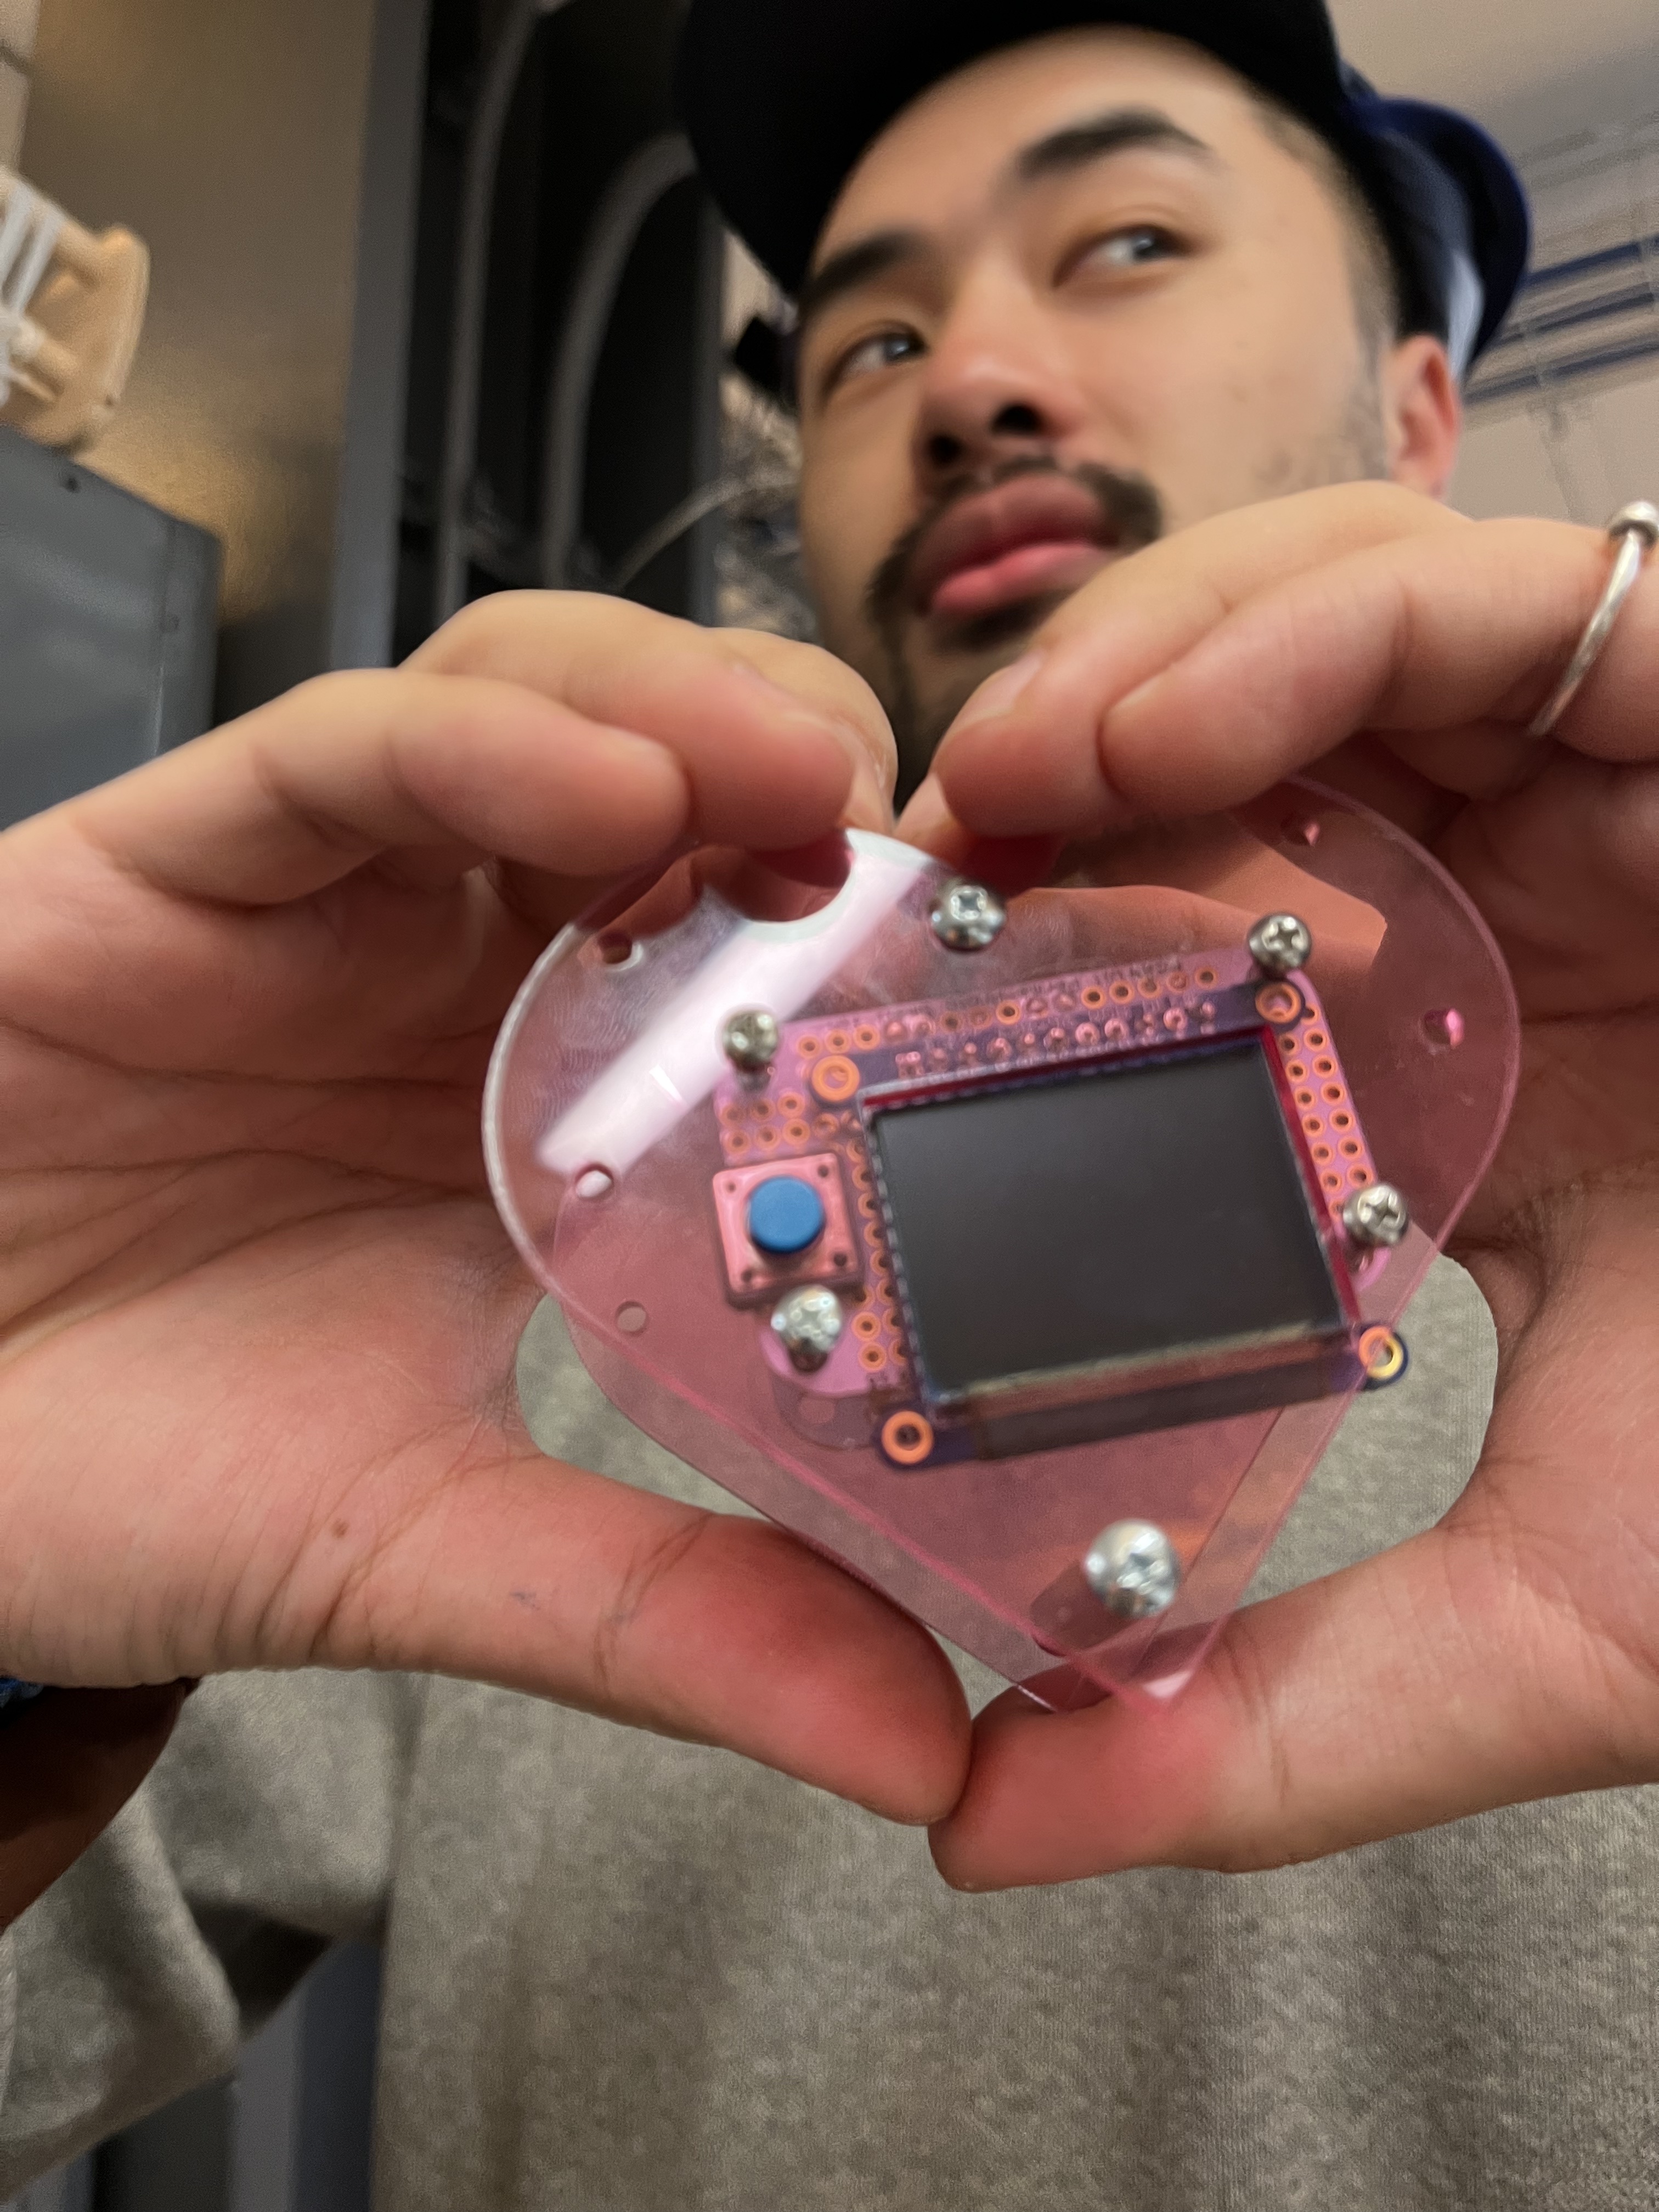

Fabrication was the same as I imagined. I measured the distance between all the holes. Cut out space for the screen and the button, and screwed the screen side to the front.
Future:
For future development, I still need to figure out the format of the BMP files so I can upload more images. The pendent itself can be slimmer. And I will look for a fitting battery.